Learning to Weld
I have been self teaching myself welding for a year or so. I picked up the cheapest entry level MIG (Clarke Pro 90 MIG Welder) off ebay and just went at it. Some other kind folks at Hackspace (Steve and Neil) showed me some arc (MMA = manual metal arc) and gave me some time on a proper MIG setup which made be realise how "Pro" has no place in the name of my Clarke Pro 90. So when another member (Barny) posted a Beginners and Improvers Welding course at Easton college I thought it would be a good idea to get some proper training and fun too. So this is what we learnt.
What is MIG welding?
Welding is the act of melting two separate pieces of metal and allowing them to fuse together into one part. To melt the metal you need a source of heat, which can come from a gas source like Oxy Acetylene or much more commonly you can use electricity as used in MIG, TIG and MMA. All these electrical welding systems use the fact that a short ciruit will heat up the two conductors due to the large current draw flowing through. Something in the order of 100-200amps is required for welding thicknesses of 2mm to 5mm. An arc is struck between the torch and the work piece which melts the metal and forms what is called the weld pool. The distance between the torch and work piece is critical to maintaining this arc and therefore the weld pool. The weld pool of molten metal will oxidise quickly in normal atmosphere which will again result in weak welds, so a shield gas (typically argon) is also fed down the gun to stop the oxygen getting to the metal.
MIG uses a roll of welding wire which is fed through a hand held gun by a motorised drive wheel. The electrcity flows through the wire into the work piece and back to the power supply via the earth clamp. The drive system means that the wire is fed into the weld pool without having to change the distance between the gun and the work piece. This makes it much easier to maintain a consistent gap and therefore arc. This is why MIG is much easier than MMA.
MIG controls
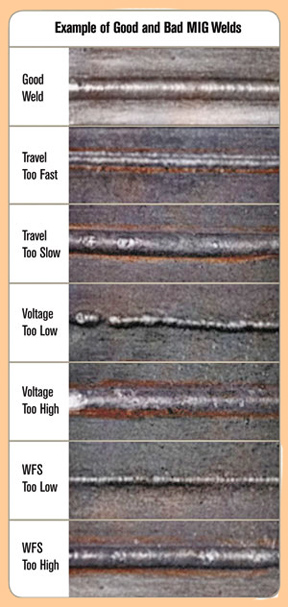
There are two main settings on a MIG welder, wire speed and amps. The ampage needs to be changed according to the thickness of metal. There needs to be enough energy transferred to the work piece to melt both parts. If there is not enough ampage you do not get sufficient penetration and the weld will be weak. If there is too much current then the metal can vapourise leaving a hole, which is problem with thin rusty metal. The wire speed is related to the current, if it too slow then it will splutter as there is not enough wire to maintain the arc. If it too quick then the wire will not melt and will poke into the work piece breaking the arc and often sticking. To get the best current flow it is important to have a good connection on the earth clamp and ideally as close to the area you wish to weld.
It is best to use a test piece of metal the same thickness as the final work to dial in the settings before getting going on your Porsche 911 turbo RS.
Safety concerns
Clearly are some very obvious dangers, one of which being heat. Clearly you do not want molten steel on any part of your exposed skin. This risk is mitigated by proper clothing, such a thick leather gloves, apron and protective boots. The arc formed is also very very bright and a welding mask is essential to prevent "arc eye" or basically sun burn on your retinas.
Sun burn is a less obvious safey issue. The arc is so bright that emits a considerable amount of UV light. If welding for long periods any exposed skin can get badly burnt.
Noxious fumes is the other less obvious risk. If welding plain mild steel then little noxious gases are emitted but if any amount of other metals such as zinc as found in galvanised metal, you can get a condition know as Metal fume fever. This is were the metal is vapourised and inhaled. At best this will make you feel rubbish and at worst can kill. It is best to totally avoid welding galvanised metal but if you do have to then make sur e you have proper breathing maskes, ventilation and grind off the zinc coating first. Top tip, the grinder will not spark until it hits steel so keep grinding til it sparks.
Lastly pacemakers must be taken into consideration as the EMF field coming off the welder can cause induction voltage spikes inside pacemakers. This is less of a problem with modern shield pacemakers but is a risk that must be considered.
MIG setup
Before cracking on with the welding we went through basic setup and maintainance of the welder. This included changing the wire roll, which can easily become a "birds nest" as the wire wants to expand away from the roll very much. The wire should be fed from the bottom of the reel for smoothest feed.
To replace a roll it is a matter of cutting loose the existing wire and pulling it out the end of the gun. This should be easy by hand, but a pair of pliers can often help out. While the wire is out it is useful to blast some compressed air down the liner where the wire feeds. Any muck and dust build up can prevent smooth wire feed.
There is a friction plate in the centre of the reel that prevents the roll continuing to spin due to momentum. You can get 25kg reels so you can imagine once you get one spinning it can spool out quite a bit of wire before it stops and this just gets into a massive tangle.
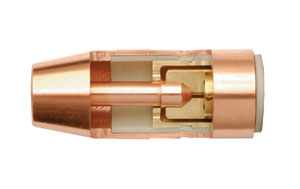
At the end of the gun there a copper contact tip, this prevents the wire from welding itself to the actual gun. There two common diameters of wire 0.6 and 0.8mm and you need an appropiate sized tip. It is best to feed the wire from the reel, down the wire liner and out the end of the gun before fitting the tip. Around the tip is a gas nozzle which holds a small volume of gas as you weld. This can get clogged with metal and needs cleaning out from time to time.
MIG practice
The welding workshop at Easton consists of a number of separate booths each one with MIG, MMA, air extraction and small filtered viewing window that allows others to watch you weld. We were given some quite thick bars of mild steel about 25mm wide, 100mm long and 3mm thick.
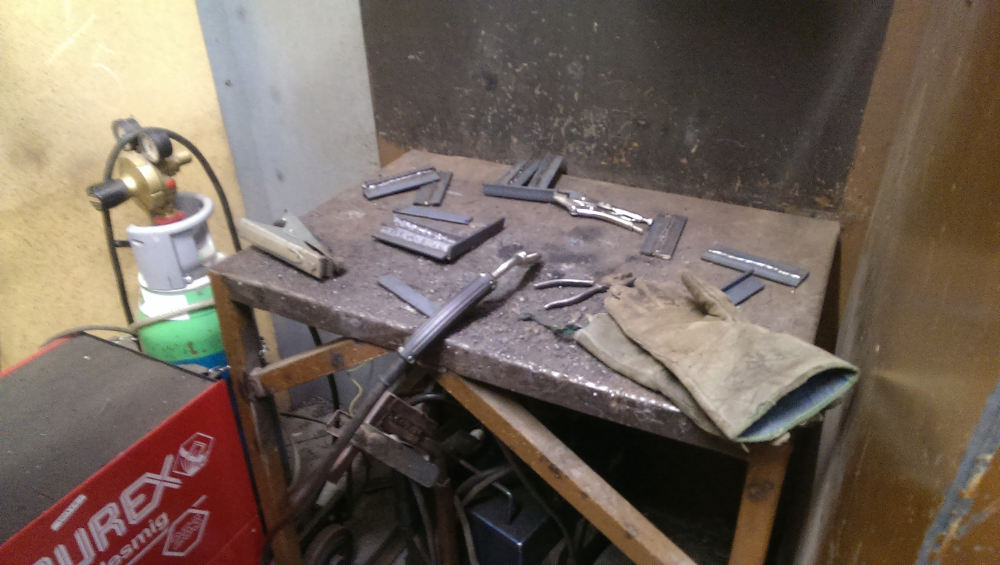 First off was to just draw some weld down the width of the bar. If you move too quickly then not enough heat is put into the piece and penetration will be poor. The weld will look thin and have an inconsistent width. Moving too slowly, the weld will build up and become piled up high and often ball up.
We then did a butt weld which is where the two pieces are side by side and a weld is put between them. The hardest part of this was following the line and I kept diviating slightly because I couldn't see. We didn't do this but were told that beveling the edges not only help with weld penetration but also help you to follow the line as you sit the gas nozzle into the groove as you pull the weld along.
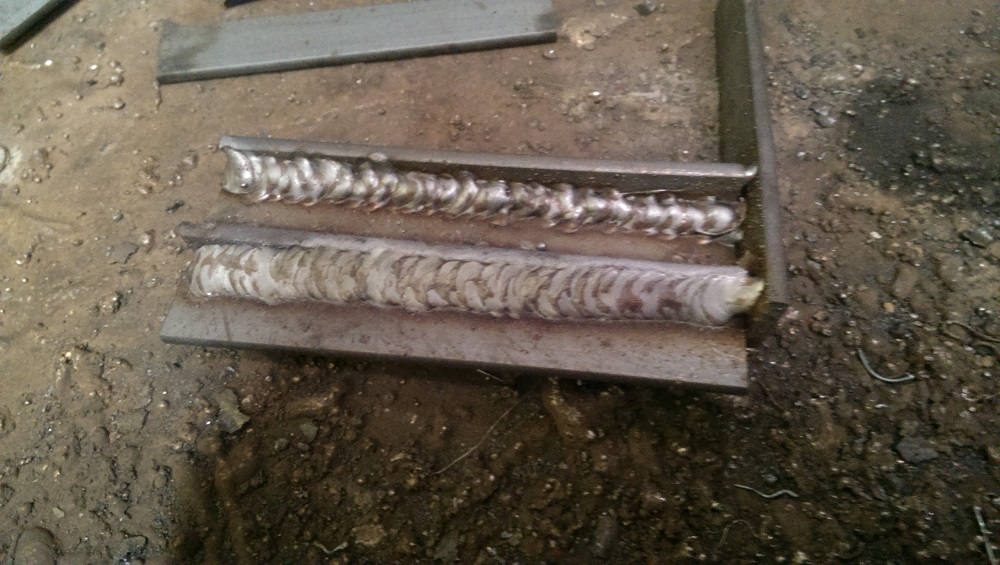 Next we put two pieces at right angles length ways. This was laid on the bench horizontally and so ther was a nice trough to lay the weld into. This was pretty easy as there was a clear channel for the weld to sit into. We also practiced over welding which puts a second layer of weld to fill particularly deep channels.
The last was to stand the bar upright and apply the weld virtically. Initially from top to bottom and then bottom to top. One is easier than the other but for the life of me I can remember which way round it is. This was tricky as you don't have gravity working in your favour. We didn't do any over head welding as this is out of scope for this course.
MMA (Arc) Practice
Our tutor favors stick welding, aka MMA, stick or arc. It is a much simpler system where the current is run through a welding rod coated in flux. The rod is touched to the work piece, striking an arc and forming the weld pool. The flux is silicate based and does the same job as the gas in MIG. It melts and forms a glassy substance which protects the molten metal from oxidisation. The rod is consumed as it provides the filler material for the weld.
It has some advantages over MIG as a wider range of metals can be welded. It can also be used to weld very thick material. He gave us several examples of stick being preffered for thick plate like bulldozers and tanks
We did a short amount of practice with a arc welder and it was so much harder to keep a smooth consistent weld. Starting the weld is much harder than MIG as you cannot see where your stick is in relation to your work piece. With MIG you just put the nozzle where you want and pull the trigger. Once you do start, it is a slower process and you can see and manipulate the weld pool more easily than MIG. The hardest part is keeping the gap between the work piece and rod tip consistent. Obviously the rod is getting shorter as it is consumed, meaning you must feed it closer as you move forward. If you get to close then you can easily weld the tip to the work piece. This makes the welder buzz and you have to strike a new arc. Move too far away and the metal starts to spatter about.
Conclusion
The course was a great opportunity to practice in ideal conditions. The equpiment was great and the metal very clean and thick. This is worlds apart from hunching down under the ass end of a Mini trying to weld paper thin rusty steel. There is clearly loads still to learn as we didn't get to overhead welding or any other metals.
It is not a super cheap course at £150 for the day but I finished the course knowing more than I started and with a few tips that have made considerable improvements to my welding. I certianly feel much more confident to make solid welds.